New Blog

.......................................................NEW BLOG...check us out.......................................................

FIRST TIME VISITOR?

FIRST TIME VISITOR?

Click on the page links below and learn how Knocking it Off can help you BE THE BEST YOU CAN BE at getting it for "AS FREE AS CAN BE."
Showing posts with label bedroom. Show all posts

Thursday, March 24, 2011

Cool Ideas (Picture display)

Do you have pictures that you want to display but don't have the amount of frames or wall space to display it?

Well here's a solution for ya!

I am a photographer and I also make announcements and invitations so naturally, I have a ton (not kidding!) of photos and invitations that I want to display. I have a workspace/office that is tiny (we've incoporated the "office" into a nook in our loft) so there is not much space (or wall for that matter!) to display my stuff. I needed something that would utilize the little space I had and maximize its usage. And of course, I wanted it to be Beautiful!

Here's my solution. . .

a "clothesline" of pictures! Not only was this a very inexpensive solution,
 it was also very easy to make!


Here's how I did it!

Materials:

 On-hand Materials: glue gun and paint brush


Steps:

1.  Paint clothespins a color of your choice. Separate the wooden parts from the metal part of the pin and paint just the wooden parts. Put the pin back together when the paint dries. (I got my clothespins from the dollar tree. I think there were 100 or 150 of them for $1.
I got my paint from Michaels for .50 when it was on sale.
They are normally .75-$1 at Michaels or .98 from Walmart.You could also glue decorative paper to the front of the pins, but that's another post!


2. Prepare "flower tacks by: putting a dab of hot glue on the head of the pushpin and attaching the pushpin (with firm pressure) to the underside of the flower. (you may also use thumbtacks. I used pushpins because
it's what I had at home) The hot glue should harden in no time at all.

3. Think about how you want your display to look and where you will be displaying it. Keep these things in mind: How many things do I want to display? How much room do I have?
How much materials do I have? Remember, you can "stack"
more than one clothesline (like I did).

Here are some ways you can choose to display. . .or you can
come up with your own!


4.  When you've chosen the style and area of display, you can begin putting it up. Simply push a pushpin into one end of the ribbon (do not cut the ribbon yet!) and drape. This is your pattern (pin, drape, pin, drape, pin). Remember not to drape too much, the clothespins and pictures may weigh it down a little causing it to sag lower. Clip some of the clothespins on to see how low it will sag. The beauty of the pushpin idea is that if you make a mistake in placement, all you have to do is pull the tack out, reposition and push it back into the wall.  


5. You may want to rotate the flower so that it will "point" downward.

6. Now all you have to do is pin your photos up. Easy, peasy and beautiful!


This idea would work well in any room. If I were to do a boys room, I would paint the clothespins blue or camoflaged and glue "boy things" to the pushpins (depending on the decor, for example if the decor were cars and trucks, I would glue a toy car/truck to the pushpin. Use your imagination when decorating and have fun! 

How much did it take for me to make my photo/art display?

Ribbon (on-hand)=FREE
Flowers (on-hand)=FREE
Clothespins (on-hand)=FREE
Pushpins/thumbtacks (on-hand)=FREE
Ribbon Photo/Art Display=FREE

How much would it take for you to make a photo/art display
if you didn't have all the materials on-hand?

Ribbon (10 yards)=.50-$1 each @ Michaels/Walmart
Flowers (1 bunch)=$1 @ Dollar Tree
Clothespins=$1 @ Dollar Tree
Pushpins/thumbtacks=$1 @ Dollar Tree
Ribbon Photo/Art Display=$3.50+

(depending on the amount of ribbon you may need,
the minimum you would need to pay would be $3.50)

Brandi-Lee

Thursday, February 3, 2011

Take a Tour: The Girl's Room (toddler beds)

Aloha everyone...If you haven't noticed by now we have a "Take a Tour" schedule. 
I'm back to doing a room and wanted you to visit the Girl's Room (again).

I thought that this project was totally awesome.

I made 2 toddler beds out of a full sized bed box spring.

Someone had given us a full size mattress, box spring, and metal frame.  The mattress was awful...to tell you the truth.  It was way too thin and hurt to sleep on.  But I know how to find the positive in it...now we use the mattress in the back of our van when we go to the drive in.  It works great for that!!!

Well..back to the project.  Now we had a box spring and no mattress.  We had gotten the bigger girls a bunk bed and were trying to figure out what we wanted to do for the little girl's beds(remember we have all 4 of them in one room...they wanted it that way).  We discussed putting in another bunk bed but couldn't see it fitting in the room.  It would be too crowded.  Then I got the idea to turn the box spring into 2 toddler beds.  They would fit perfectly in the room (with out taking up too much space) and I already had 2 crib mattresses from a friend.  So of course this project cost me....are you ready?...FREE (that's how I roll)!!!

These 2 beds are made from one full size box spring.

Take a look...
Here you can see the box spring frame.

All I did was measure the matress on the frame, mark it and cut it...I didn't have to do anything else. 
Frame done.  It worked out perfect!  I got 2 toddler frames from 1 full size box spring.

I cut ply board (that I already had) and put it into the empty spaces to create a solid flat top.


Here it is all covered up.
Here it is with the mattress on it.

Tada...
2 bed frames, 2 bed skirts, and 2 toddler mattresses.

Cost =  FREE


p.s.
I made the blankets from sheets and pillow cases bought at Goodwill on a half-off day.  I did have to buy the batting (but I bought it at 50% off) and I already had the thread and yarn.
I also had to buy the crib sheets.  Looked at Goodwill for a month and couldn't find any or at garage sales so I ended up buying some from Walmart.  You can't win them all:):(

Blankets, pillow cases, crib sheets = about $10 each bed
(sorry...I did this a while ago and can't remember exact figures so it's a guess)

The room is still a little plain so...more to come.

mileka:)

Friday, January 28, 2011

How To: French Message Board


I had sitting in my collection a 16x20 frame that I got at a garage sale sometime last year for super cheap (50 cents!!!!) . It was beautiful and ornate and I couldn't wait to use it but I hadn't since had any luck figuring out what exactly I wanted to do with it. . . .until about 2 weeks ago.


I knew I wanted it in my room because my room colors are burgundy and gold. At first I wanted to put a picture in it (cuz I just love, love, LOVE pictures!) but because it didn't come with any glass (I believe it previously held a canvas painting and I didn't want to buy another glass), I ruled that out. Then I wanted to cut wood or put cloth in it to frame some lettering or a quote. . .but I didn't act upon it so it never got done. I had always wanted to make a french message board so at last, I finally decided to make my long-awaited french message board and frame it! (In this Tutorial, I will show you how to make a French Memo Board to hang with or without a frame)

Ok, so the next step was to figure out how I could make this project for as free as can be. If you had built up your arsenal to a pretty decent size as I have, then completing projects with things you have on-hand will be easier. The thing is, I don't want people to say "Well, it's inexpensive to you because you had all that stuff on-hand and I don't". Well, there will always be something that you dont have on-hand, I just try to make it easier by utilizing materials (for my projects) that most people in the good ole' U.S. of A. have laying around the house.

K, now that that's over with, my materials are:  2 (or 3) pieces of cardboard (cut to fit my frame), fabric (enough to cover the front of the board and 1-2 inches behind it) and ribbon (a good amount, this is the material that you may not have on-hand). I also used a staple gun for assembly. I wanted to also mention that if you had any batting, it would be great to use on this project. (oops, forgot to put my frame in the pix)


You want the ribbon and the fabric to be pretty (or decent) because that is what will be showing on your board. And just because you dont sew, it doesn't mean you don't have fabric laying around your house! You could use pillow cases, bed sheets, curtains, a towel or maybe even clothing! Be creative!


Step 1:  If you have batting, wrap it around the 2 pieces of cardboard, pull it taut and staple it on the back. (I didn't use batting because I didn't have any and wanted to make my board as free as it could be. If I had had any though, I would definitely have used it.) The batting will make the ribbon "taut-er" (if that's even a word) and will hold your notes and pictures more securely. Next, wrap fabric around the 2 pieces of cardboard (or batting if you used any). Make sure you pull it taut so the front is nice and smooth. The 2 or 3 pieces of cardboard
is so when you staple the fabric and ribbons to the board, it won't poke through the front. Trim excess fabric.


Step 2: Start Laying out your ribbon on the board and cutting them out. (Do not staple yet!) Make sure there is at least 2 inches of ribbon that reaches around the back of the board.


Step 3: When you have all the ribbon arranged nicely, Staple the 2 longest ribbons to the board (it should look like a big X).


Bring the Ribbon around (pulling it taut) and stapling it to the back of the board. Trim the excess ribbon.


Step 4: After stapling the X, start stapling all the ribbon going one way. Make sure it is taut! Eye the spaces in between ribbons to make sure they are straight.

Step 5: After stapling all the ribbons one way, start going the other way but. . .weave the ribbons over and under the already stapled ribbons (like those paper quilt patterns you did as a kid). Rub your hand over the front part of the board. If you feel any staples poking out, just lightly pat it down with a flat object. If you used at least 2 pieces of cardboard, it should be thick enough to hold those staples (and fabric and ribbon securely) without poking out the other side.
Step 5: This is the last step for those of you that want to hang your memo board without a frame. With another piece of ribbon, make a hanger and staple it to the back of the board. Voila! a homemade french memo board for as free as can be!


Step 6: Finally, I placed my memo board in my frame. Make sure you cut the cardboard to fit the frame exactly. Try out the "fit" before you actually make the memo board. I hung my memo board in the perfect place in my room. It looks Awesome!

Shucks! almost forgot to show ya'll just how FREE this project was!

Cardboard=Umm, FREE!
Fabric (on-hand)=FREE
Ribbon (on-hand)=FREE
Frame=50 Cents 
French Memo Board Total=50 Beautiful Cents!!!

Now that's as free as can be! *;)

Brandi-Lee

Thursday, January 6, 2011

How To: Custom Bench

Here is how to create the custom bench as found in "Take a Tour: The Girl's Bedroom (closet)."  Sorry...I did this project quite a while ago so I don't have all the steps in picture form.  Enjoy my attempt to "remake" steps.  Remember, I had all of the supplies/materials and tools on hand so it cost me = FREE


1. I cut a ply wood (FREE) for the seat to the length I needed (to fit between the shelves).  The wood was 1.5 inches thick and 9.5 inches wide (that's how I got it...nothing special).

2. Then I wrapped it like a present with batting (which I already had-FREE) and scrap material from a previous project (FREE).  I used my staple gun to tack it down.


3. I already had the wood for the legs.  They were reclaimed from a previous project.  They were previously 4x4 fence posts (I had used it as legs for a short kids table for a party).

4. I cut a piece of ply board (1/2 inch tick-left over from another free project)
5. and screwed the legs to the board. 
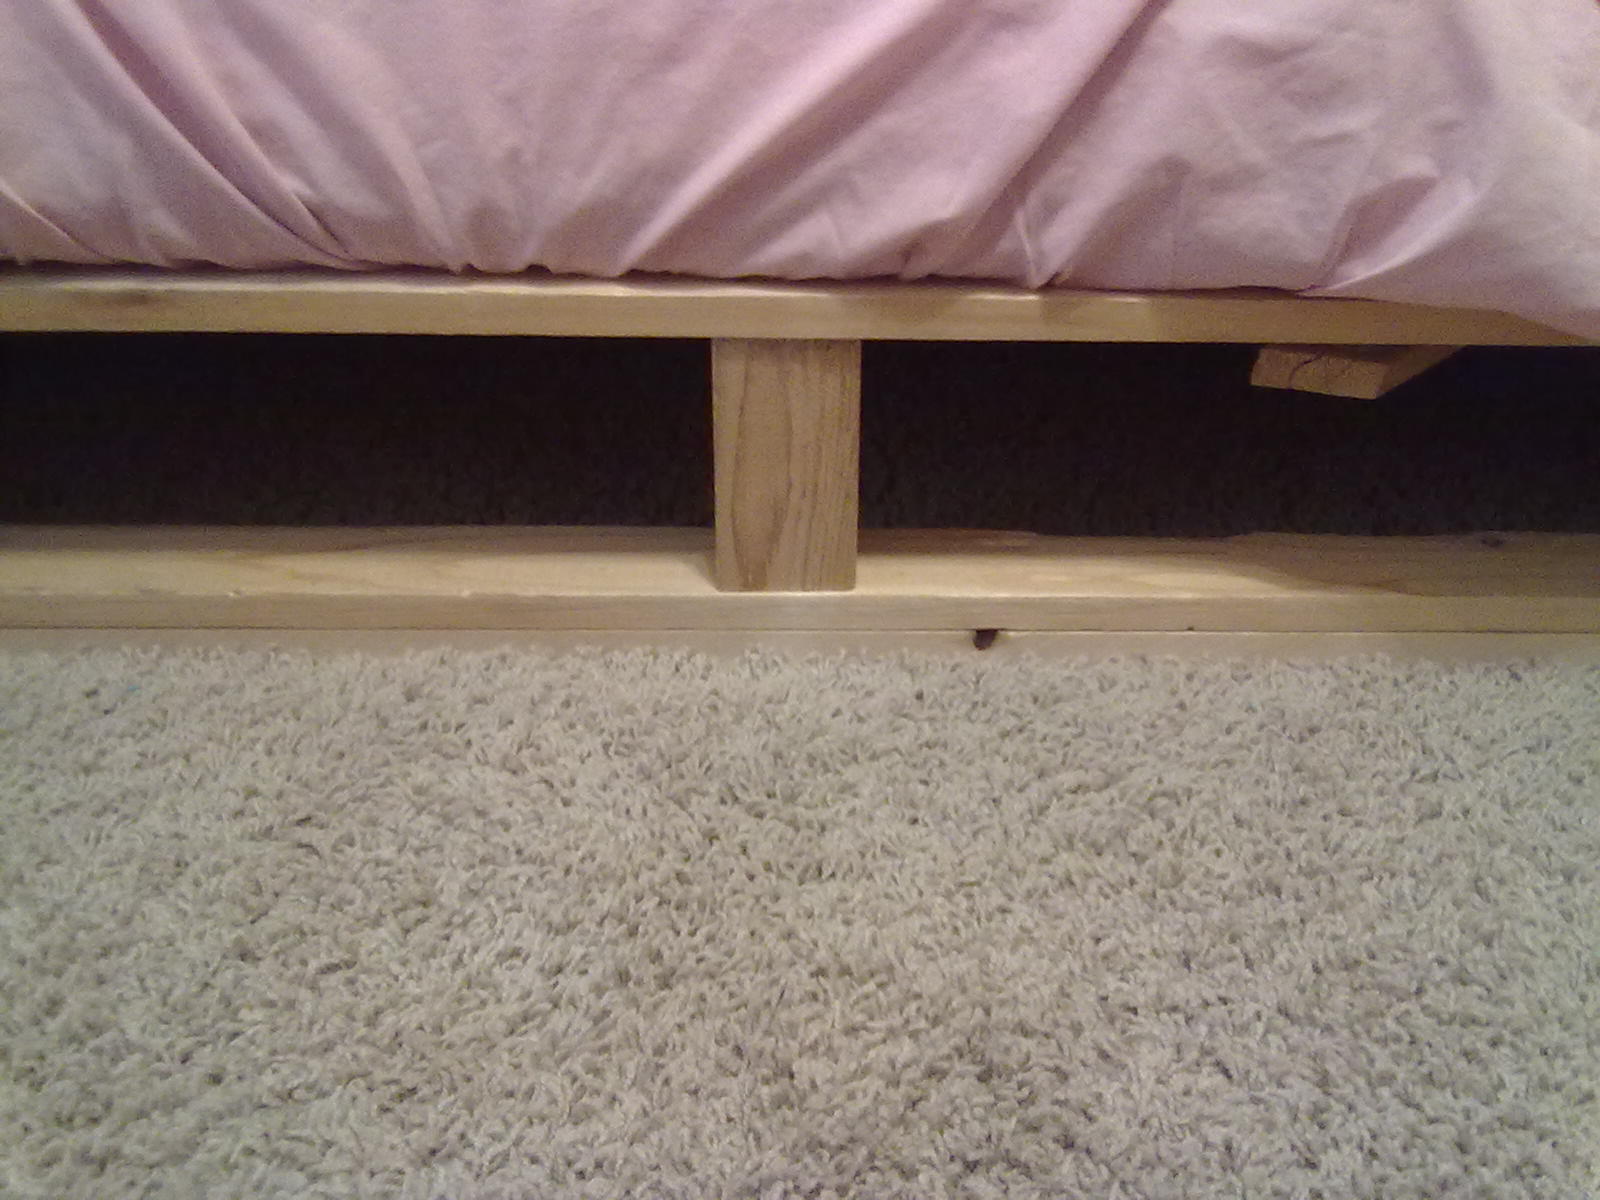
(I hope you can see it below the legs of the bench...
that brown part sandwiched between the seat and the legs).

I did it this way because I wrapped the seat first (yes, on purpose). 
I needed the legs to be as far out as possible for balance, so I had to attach it last.

 6. Then I screwed the plywood piece to the seat section. 


Tada...Custom Bench
Cost? FREE

I'll probably end up painting the legs to match the girls room...
...when I kick it up a level.
For now...it's functional so it works;)

Mileka:)

Take a Tour: The Girls Bedroom (Closet)


Total $6
-----------------------------------------------------------------------------------------------------------

This is a work in progress!  We have all 4 girls sharing the same room.  They refuse to sleep apart from each other (oh...how cute!).  But...this makes their room a challenge.  Things can get pretty dangerous in a short amount of time.  If you have girls you know what I mean.  Being extremely busy also makes getting projects done (like the girl's room) a challenge, so I do what I can here and there.  I want to keep their room simple....no, I need to keep their room simple or it looks like a hurricane dropped in for a play date


1.  We removed the closet doors to create more space in the room.
DOOR REMOVAL = FREE

2.  I put up a "window treatment" on their closet to hide the junk on the upper closet shelf.   
I used the curtain rod from their window. 
"WINDOW TREATMENT" = $2 (Goodwill-Dollar Day)


3. I created a desk area using interlocking cubes and the side railing of a bed frame.  The bed frame was free & I had everything I needed to put it together.
DESK TOP = FREE
CUBES = $4 (Garage Sale)
CUSTOM DESK TOTAL = $4

4. The desk needed storage so I used plastic tubs I already had. 
I put numbers on the boxes because 
each child has an assigned number-assigned by birth order.  
I found the number stickers in a pile of free stuff left out on some one's sidewalk.
STORAGE = FREE


5. The girls needed something to sit on so I made a bench that would fit under the desk when not in use. 
I already had all the materials needed for the project.
CUSTOM BENCH = FREE


GIRL'S ROOM CLOSET:
"Window treatment" = $2
Custom desk = $4
Storage bins = FREE
Custom bench = FREE
TOTAL = $6


This is what it is so far. 
I have plans to do more as time permits. 
You will see posts about their room (in the future).


The Girl's Room...to be continued!

Mileka:)

Related Posts Plugin for WordPress, Blogger...